Creating Borders In Photoshop – Two Ways And Two Different Situations
In this tutorial here I will tell you how to create photo borders or frames around your images. Adding borders to photos is fairly easy done with Photoshop. But before we want to add borders to photos, we should realize that there are naturally two ways how we can achieve to get frames around our images.
We must understand our image and the subjects in the photos or the objects in the photos that we want to show off or highlight and which we don´t want to hide behind borders. What I mean with two ways to create borders is,…
1. We could create borders starting from the outside to the inside of the image and that would mean we use the room we have in the image but we wouldn´t change the picture size with this method.
2. We could also create borders that expand outside of the image, which means the size of the image would be increased to a few pixels outside of the image and this method would result in a bigger image than we had earlier.
It´s not really rocket science and some might already understand why both methods should be mentioned but if you don´t understand, I will show you now two different photos that should explain the situations and the different approaches to create borders in Photoshop. Now look at both images (You can click on them to enlarge them)…


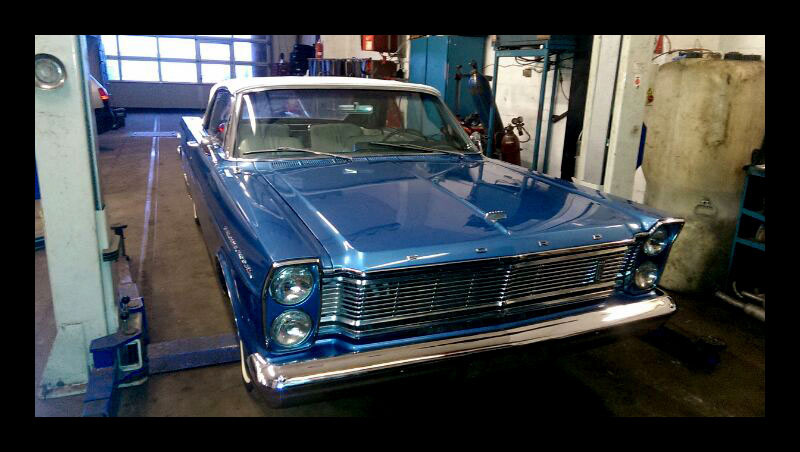
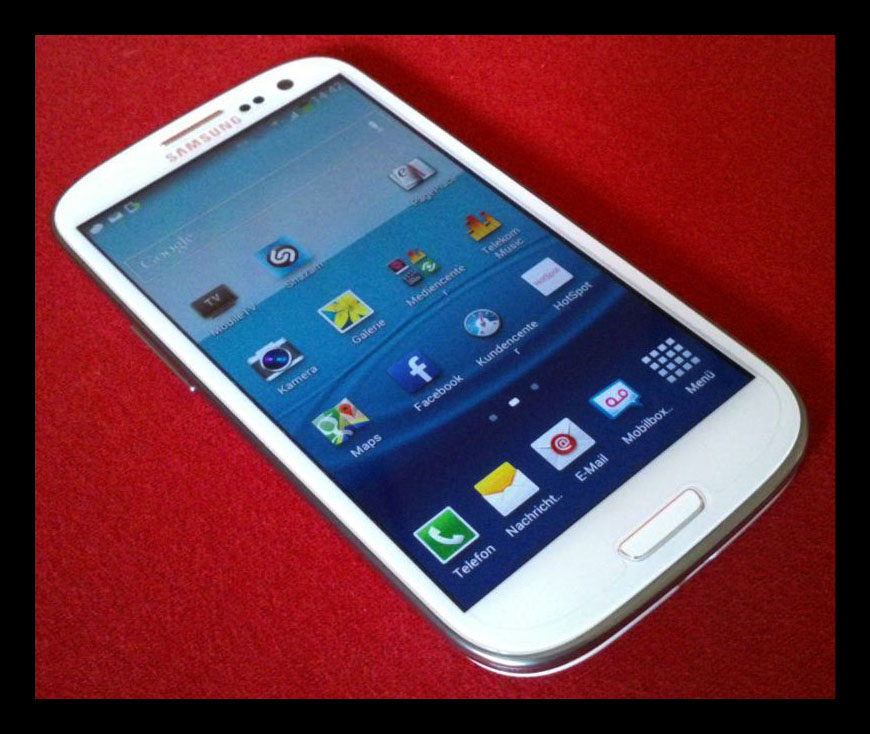
As you can see, the subject in the first image is a car and around the car is maybe not much space but still enough where we could add borders, without touching the car. The subject in the second image is a smartphone but the problem with this image is when it comes to adding borders, that there is little to no space around the phone to add borders, which means we must expand the image outside, otherwise we would hide parts of the phone behind the borders. Method 1 of adding borders would work with the car photo and the method 2 would be better for the phone image. In other words,… With the car photo we can create borders to the inner side, while it is better with the phone image to create borders that expand the photo size a little bit outside.
I hope this explained both different approaches and situations well enough. I know this is boring as hell but essential to understand before we finally start to learn how to apply both variants. But we will do this now. From now on, I will just call it “borders to the inner side” and “borders to the outer side”. You can download both example photos to use them for this tutorial and to learn creating borders, so let´s start…
Creating Photo Borders To The Inner Side – The Car Image
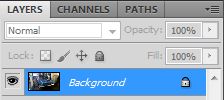 1. We open up the car image with Photoshop and we look at the layer panel at the bottom on the right. The layer is called “Background”. For the non destructive workflow, we will duplicate this layer…
Right click on the “Background” layer and choose “Duplicate Layer…” in the opening menu.
2. In the Photoshop menu at top, we will now open the “Edit” menu and then we will click on “Stroke…” and a new window will open.
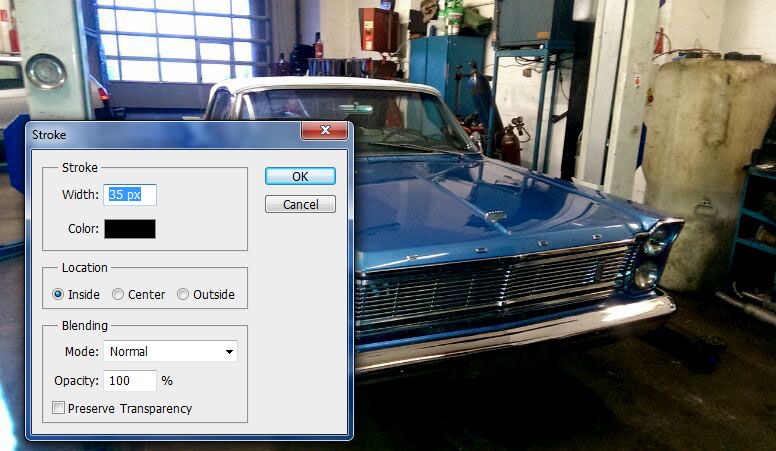 3. The settings in the window should be self-explaining. In the “Width” field we can set up the size of our borders in pixel. I thought 35 pixel would look ok with the car photo as the borders won´t touch the car then. In the “Color” field I decided for black frames but this is also a matter of taste.
Under “Location” we need to choose “Inside” and the “Blending” settings doesn´t matter at the moment if we only want to have simple and plain borders.
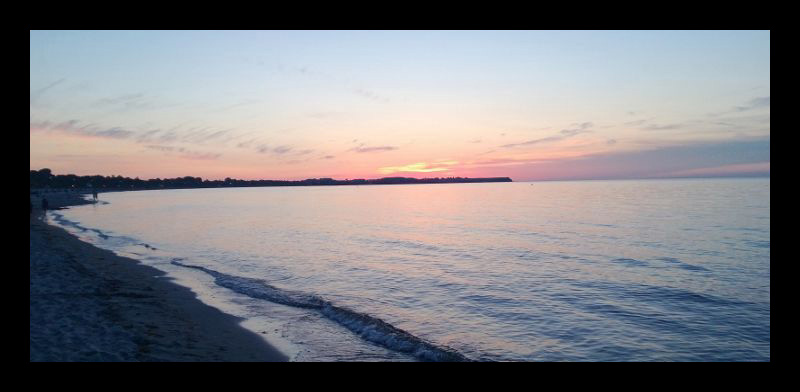
Let´s click ok and we will get our borders. In my case the black borders…
 So much about the basics of creating borders that expand to the inner of a photo.
Creating Photo Borders To The Outer Side – The Phone Image
Now let´s talk about the situation with the phone image. We could still use the same method like we did with the car photo but I promise you that we could only create a tiny frame as we otherwise would hide parts of the phone behind the borders and that is not our intention. There is simply not much free space around the phone but what if we still want to add bigger borders to the image? Yes, it´s still possible to create borders that won´t contact the subject in our photo…
1. We load our image and once we did that, we will open the “Image” menu at the top of Photoshop. There we will choose “Canvas Size”. A new window will appear.
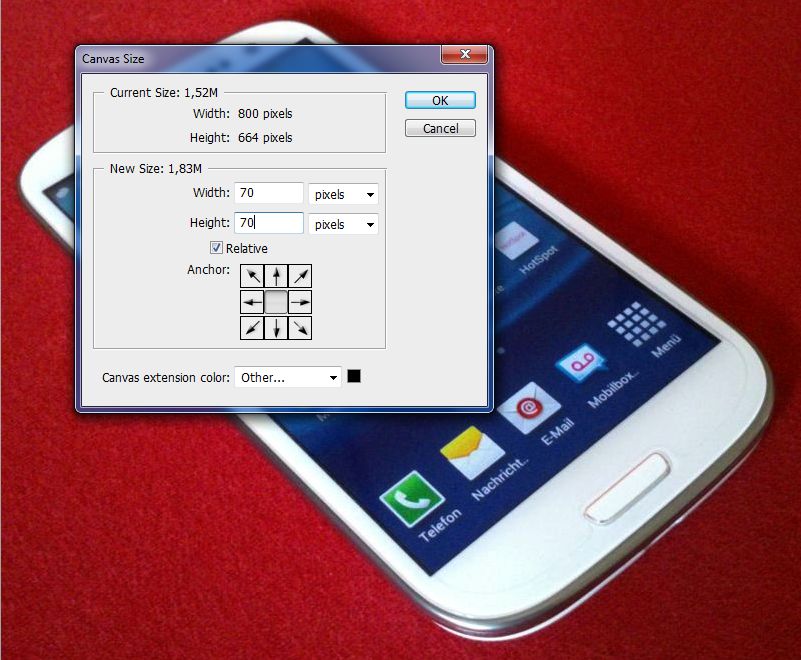 2. Now, the first thing we should do is changing both, the “Width” and “Height” units to “pixels” as I think it is better to work with them.
Next to it, we can type in the amount of pixels we want to add per “Width” and “Height”. For the example here, I decided to expand the image about 70 pixels for both, a good amount that wouldn´t have worked with the earlier described method, without hiding parts of the object in the scene.
Under “Canvas extension color” you can change the color of the borders. Simply click on the color box next to it and choose a color. For the example here, I use black again.
If you did set up everything, then just click on “ok” in the window and you will see your results…
Last Words About The Tutorial
I could image that there are even other ways to create borders. That is so great about Photoshop. The tool is so complex that there isn´t just one way of doing things. But the described methods in this tutorial are the ones I know. I hope I was able to help you to learn something new. If you have cool additional information’s or maybe even questions, then check out the comment section unter the article. Have a good day.

2 thoughts on “How To Add Borders To Photos With Photoshop”