A friend posted a funny photo on Facebook. She lives in a basement flat and has one of these deepened basement windows with a grid where rainwater flows in or where smaller leaves can fall in. Around the flat is some nature and she said that she have seen several curious visitors on the window. Well, she was talking about some frogs and said they like to stop by to say “Hello!”. She posted an evidence photo and I had to laugh because the frog looks so cute. The photo was not in best quality but other than that it was a fine photo and I asked her if I could edit the photo with Photoshop to show it on my website and she said that it would be ok if I show her the result. I did that already but now I want to show it here as well…
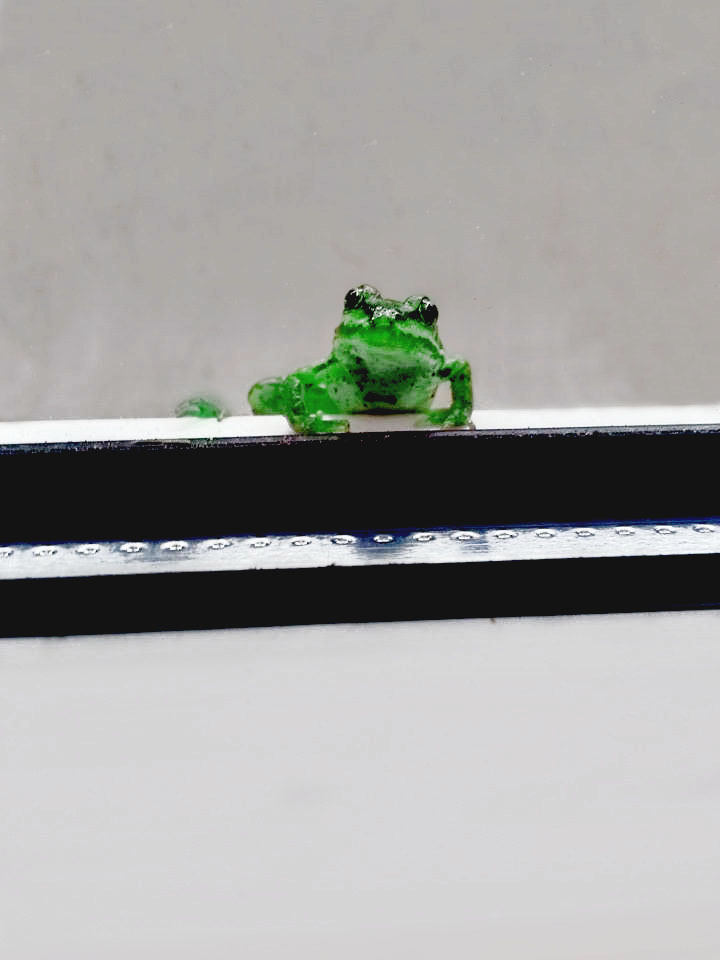
The photo above is not the original as I have edited it and made some heavy changes. I mentioned that I love to play with layers, effects and colours in Photoshop lately. I think I described already what I often do and how I change colours. But sadly I never wrote an in-depth tutorial about my workflow. I just described it a little bit but it might be that I will write an in-depth tutorial some day too.
What I did with the frog photo above is pretty similar. I created tons of layers in Photoshop and I experimented with different colours and painted them above different areas of the image. The always paint over the newly created transparent layers which means I do not have to paint on the original image and that means I can´t destroy anything and I always could go back and forth with any changes. The next thing is that you can change the transparency of the layers in Photoshop. My basic concept here is that you can create darker areas if you use darker colours while painting over any image area or you can even lighten areas of the image if you paint with bright colours. And then you can adjust the transparency of you painted layers to adjust it further. I use this technique for example if I want to whiten a window frame even more. Or you can make the dark areas of the window much more black as said.
Sometimes I also like to go crazy and give the image a surreal style. The frog in the image above is for example not really that green. I created a new layer above the image to paint over it with a green colour. Then I tested different layer blending modes until I found a great one. They all can give you different results which is why I like to try some of them. Later I adjusted the transparency of the layer with the painted green as this is the way I can change the intensity of the green coloration.
The background behind the window and frog isn´t original anymore too. I wanted to have a cleaner looking background so that the frog is much more the focus of the whole image. That can be done with the clone stamp tool in Photoshop. Basically you need to look for a bright and clean wall area and use the clone stamp tool to duplicate this area and paint it over the dirty and darker wall areas. It works like replacing one section of the image with another one. I suggest to experiment with the clone stamp tool in Photoshop. It´s fairly easy to understand and can be a lot of fun. You will love that tool. That´s how I got a much cleaner wall and that is also how I removed some of the spots on the window.
To understand what I am talking about, I can show you the original image. Compare the frog colour on both images, the wall and the window and frame…
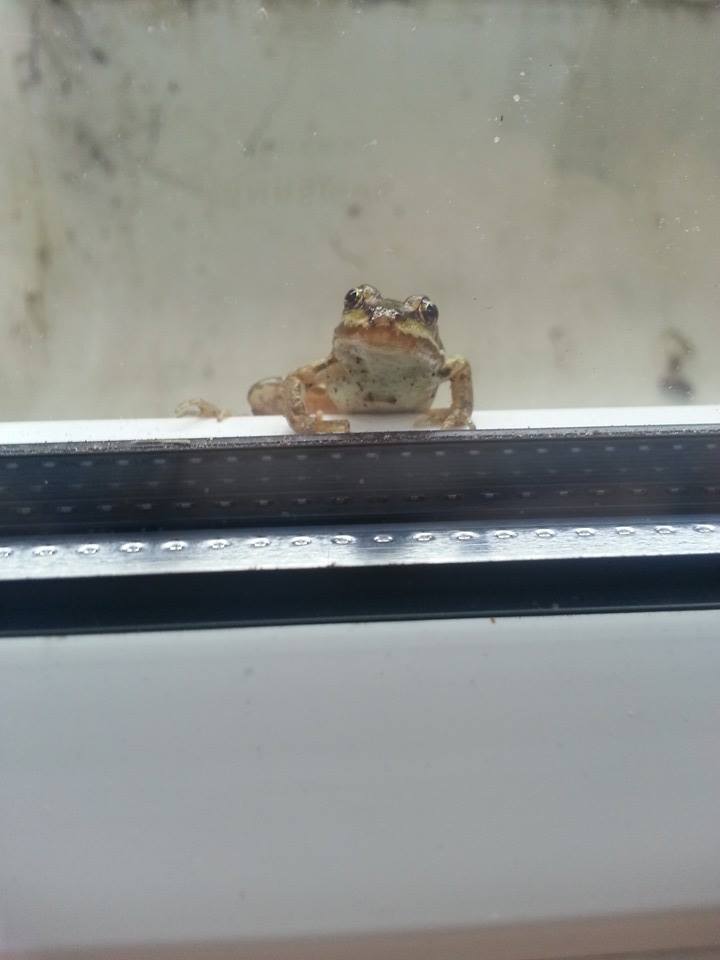
But I do not only write this article here because I want to show what I did with her photo. I also write this article because I suggest you to never trash any images because you think that the quality is bad. You can improve photos a lot with Photoshop. Look at the two images above and you see what I mean. It is always a matter of taste, however it shows that there is much more possible than just adding contrast to an image. And I am by the way no Photoshop expert and that must be said. There are millions of great tutorials in the internet. It might take time to read but it is very rewarding. Photo editing is a hell of fun.
So again… never trash any photos. You might want to mess around with them later and it could happen that you create something great out of it. The quality of the photo of my friend was not too bad, but I simply wanted to mess around with the photo to give it a “more sterile” or even surreal look. I thanked my friend for the great image. I had some fun playing with the photo and it seems she liked the result.

One thought on “The Photoshop Frog…”